A great tool to create, edit, and publish content for your blog
If you struggle with the post/page editor in WordPress and you find yourself missing the comfort of your desktop document software, then desktop blog publishing tools may just be the answer to all your dreams. (okay, maybe not ALL your dreams)
One such tool for Windows is Windows Live Writer 2011. I’ve been hearing about this tool for several years and, until just today, I’ve not explored using it. A quick and simple free download from http://explore.live.com/windows-live-writer and I was set up. Easy to connect to my blog with the url and login credentials and I was on my way to a life of familiarity and comfortable content creating.
It’s not just for creating and publishing blog posts either. You can create and publish pages, too. You can also edit existing posts and pages. Interesting. This is ideal when using WordPress for both your website and your blog. Pages = website pages, Posts = blog posts.
Simpler table creation
One of the things I find most annoying is utilizing tables in WordPress efficiently. Even with WordPress plugins, like TinyMCE Advanced, I find the lack of ease of use and functionality slightly aggravating. The beauty of desktop blog publishing tools is that it blends the ease of use that you’ve become accustomed to, with the ability to post content to your online location painlessly. Being able to create your content while offline is ever-so-convenient. Adding categories, tags, setting a publishing date are all at your fingertips in the menu ribbon (now very familiar to Microsoft Office users). Once completed, publishing it live, or as a draft, online is as easy as pressing a toolbar button.
Creating a table for your WordPress blog post using Windows Live Writer 2011 is a breeze. However, while you can easily align an image on your page, I couldn’t find page alignment settings for the table. What? Oh wait, I just selected everything in the table and used the paragraph alignment toolbar button. OK. I guess that works.
Even better table options with a plugin
After posting this post the first time as a draft, I noticed the table layout still lacking what I wanted. Quick research revealed a free table plugin for Windows Live Writer to provide better tools and options for my tables. Here is another table after I installed this plugin.
The new plugin insert window. You actually have to click on the Table Plugin in the plugin window to get the right insert window to display:
The new table:
Breezy image tools
Adding screenshots is as simple as using your PrintScreen keyboard key to capture the image and using your Ctrl+V keyboard shortcut to paste it into your post in Windows Live Writer. It’s just like doing this in a Microsoft Word document. When you publish it to your blog, the images get uploaded automatically to your blog’s image folder location. Yay! I’m happy. ![]()
Double-clicking on the image opens the Picture Tools Editing toolbar in Windows Live Writer 2011, which allows you to easily crop, resize, stylize, align, set hyperlinks, set alt text, and edit the image on the spot.
Posting videos within your blog post is also a snap.
Choices are: from the web, from the computer, from a video service.
And here is the YouTube video embedded into the post.
Need a little reminder about setting your categories and tags? No problem.
There is a setting in the Windows Live Writer options to remind you about such important things when you go to publish your content. I like that.
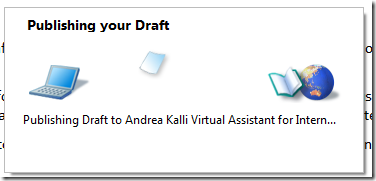
Watch the publishing magic happen…
Plugins for those extras.
There are even plugins for Windows Live Writer for added features and functionality, located at http://plugins.live.com/writer/browse?orderby=featured&page=1.
While I’m thrilled with the various built-in options that come with this free tool, there are some features lacking. I wanted to be able to draw an arrow on my image and circle something on it, but there’s no way to do this. At least I can’t find a way. If you know how, I would love to hear from you. Not sure if any of the available plugins can do this. Guess I’ll need to try some of them out. Ahem. Another day perhaps.
All in all, I believe I’ll be using Windows Live Writer from now on to create and publish my blog posts and pages on my various WordPress blogs. I know many clients that might enjoy the extra ease of use and familarity.
Kind of a bummer…
It’s kind of a drag that you don’t have any control where the drafts are stored on your computer. However, I did find an article that talks about a registry change. Here’s hoping this is something that is available in the next version, don’t you agree?
How to change the Drafts and Recent Posts folder in Windows Live Writer 2011
They are currently located under your My Documents folder in a subfolder called My Weblog Posts.
Features:
Get blogging with easy setup
Set up multiple blogs in Writer. Writer works with many popular blog services such as WordPress, Blogger, and more.
Add photos and videos to tell your story
Make your story come to life by adding photos and videos to your blog posts.
Create stunning blog posts in minutes
Create stunning blog posts in just a few moments using the ribbon to format text, photos, videos, and more.
Add a Bing Map
Insert a Bing Map in your blog post to display a location.


